Awards

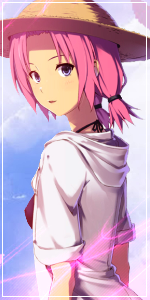
This is a tutorial how to color a manga
First things first:
For this tut, you will need to have Photoshop. The version I am using is CS2, but it should work with other versions as well. You will not need to install any brushes or extras or anything like that.
Vocabulary:
Brush: When I say, "brush", I don't mean to select a brush. "Brush" in the context that I will use it means to take the "dodge" or "burn" tools to add shadows or lighting.
Burn: "Burn" is the tool to add shadows to a color. You'll be using this tool a lot, just like the "Dodge" and "Smudge" tools.
Channels: A "channel" is something you can also think about in terms of layers, except each layer has a certain duty to perform, a certain color to retain. In most cases, there will be four channels. The RGB channel, the Red channel, the Green channel, and the Blue channel.
Dodge: "Dodge" is the tool to add highlights to a color. You'll be using this tool a lot, just like the "Burn" and "Smudge" tools.
Eyedropper: The "Eyedropper" tool is very important in its own way. It allows you to pick up colors from other places so that you can match them, just in case you had used another color and had to go back and use the same one again. (For example, say you were colouring Naruto's hair and went to his eyes, but then forgot to color his eyebrows. You'd want the color to match, so you would select the eyedropper and click his hair to get the same color again.)
History: Your "History" is the record of your actions in Photoshop. With this window open, you can go back to previous steps if you made a mistake, but be aware that going back to fix a mistake means that you lose any progress you may have completed beforehand.
Layer: A "layer" is a very important tool in Colouring. Unfortunately, they're hard to explain, but also, exactly what they sound like. Think of being in the winter, and wearing many different layers of clothing, one on top of the other. That's exactly what this kind of layer is like. You put one layer on top of another, and if one layer is below another, you may not be able to see it. Hopefully, by the time you finish this tutorial, you will have a general concept of the purpose of a Layer.
Navigator: This tool, located on the top right hand side of your Photoshop display, allows you to see a minaturized version of the file you have open, and also, a notch on a sort of "scale", that allows you to zoom in and out of your image. This is very helpful, and we may use this a lot.
Paintbucket: The "Paintbucket" is how you will distribute base colors to the image.
Polygonal Lasso: This tool is how you select the area that you are going to color, such as an eye, or perhaps the mouth or hair. The Polygonal Lasso is one of the most important tools you will use.
Selection: "Selection" is the area you have selected to work in for the time being.
Smudge: The "Smudge" tool is what you will use to blend the colors together after you have added shadows and highlights to "refine" the colouring. This is an important part of the colouring process, and most likely will be the tool you use the most in this tutorial.
That's all for TOOL Vocabulary. If any other words come up in the tutorial, I will explain them on the spot. These are just the important ones.
Now, the real tutorial will begin.
__________________