(Senpou Mokuton: Shin Susenju) Wood Sage Art: True Thousand Hands Technique
Type: Offensive
Rank: Forbidden Rank
Range: Short-Long
Chakra: 150 (-30 per turn)
Damage: N/A (-20 to the user)
Description:
After entering Sage Mode, Hashirama claps his hands together and creates a wooden statue of titanic proportions, easily able to dwarf a tailed beast like Kurama which it can easily grasp in one hand. Thousands of hands emanate from the statue's back in countless concentric rows, while its two main hands are clasped as if in a prayer. This technique seems to be influenced by the Buddhist bodhisattva of compassion, Avalokiteśvara, also known as "Senju Kannon" (Thousand-Armed Kannon). Legend tells that Kannon, vowed never to rest until he had freed all beings from Saṃsāra. After strenuous effort, but struggling to comprehend the needs of so many who still had yet to be saved, his head splits into eleven pieces. The Buddha Amida, seeing his plight, gives him eleven heads with which to hear the cries of the suffering. Upon hearing and comprehending all these cries, Kannon attempted to reach out to all those who needed aid, but found that his two arms shattered into pieces. Once more, Amida comes to his aid and grants him a thousand arms with which to aid the suffering. The statue is able to stand and move in order to attack on Hashirama's behalf. This technique can defend the user from virtually any attack and its offensive abilities are enormous. If used for melee attacks, each of its punches or kicks is equivalent to an S-Rank attack and have enormous reach, spanning up to Long range. It can detach itself from the thousand hands on its back to move faster and gain agility if needed, which it can regrow later on. Its completely immune to Bijuu chakra techniques and can be used as a medium for (Kakuan Nitten Suishu) - Tenth Edict On Enlightenment in the same way as the Wood Human technique.
Note: Can only be used once per battle by Senju Hashirama with Sage Mode active
Note: Lasts for 5 turns during which the user cannot mold elemental techniques other than Wood, Water or Earth ones.
Note: When the technique ends, the user is depleted of sage chakra and exits sage mode
(Senpou: Chōjō Kebutsu) Sage Arts: The High Buddha's Power
Type: Offensive
Rank: Forbidden rank
Range: Short-Long
Chakra: 100
Damage: 140 (-10 to the user)
Description:
A relatively simple physical attack technique, Hashirama utilizes all the hands of the Wood Sage Art: True Thousand Hands Technique simultaneously to deliver thousands of powerful blows to a target. Due to the sheer volume of the punches involved, defending against the entirety of them is nearly impossible. These punches are of such magnitude that they were able to completely destroy Madara Uchiha's final Susanoo, strip it off the Nine-Tails, while at the same time create a massive crater which later became known as the Valley of the End.
Note: Can only be used twice by Senju Hashirama bios with The Wood Sage Art: True Thousand Hands Technique active.
(Senpō: Myōjinmon) Sage Art: Gate of the Great God
Type: Supplementary
Rank: S-Rank
Range: Short-Long
Chakra: 70
Damage: N/A
Description:
An amazing sealing technique which is used by Senju Hashirama while in Sage Mode and has so far been seen as the only technique able to contain even the Jubi. After making the Ram seal, the user manifests a select number of red wooden torii gates that fall down from above (manifested mid air above the target), in order to pin an intended target between the gate and the ground. These torii are quite versatile and can be used in several different ways (like pilling them one above the other to increase their sealing strength). Their size is always proportionate to the target and once beneath it, the target becomes unable to mold chakra while having it slowly drained. The torii form instantly and fall down at amazing speed, making it almost impossible for the target to escape it. Two main uses have been seen so far, each with a specific use but with complementary uses:
Ten Seals (封十, Fūtō): Creates up to ten torii that can be used to pin several individual targets simultaneously or on top of each other in a single target. The targets become unable to mold chakra A-rank and above and get their chakra drained slowly (50 chakra points per turn) while beneath the seals. Beneath the seals, the target cannot move. The seals can be placed strategically to completely pin the target down, like in the case of a fully transformed jinchuriki, pinning each tail and each limb to the ground.
Head Seal (封頭, Fūtō): Creates a single, large torii, intended to pin the target's neck beneath it, so as to immobilise their head and finalize the seal. This last seal can only be placed after the user has successfully placed the Ten Seals and doing an additional Ram hand seal. Once placed, the target will not only be fully unable to mold chakra but will also get his chakra drained in 100 additional points per turn.
Note: Can only be used by Senju Hashirama bios while in Sage Mode
Note: The seal is specially effective in Jinchuriikis and Bijuus which, upon having been pinned under the 10 seals in any of their transformations or modes, will be rendered unable to mold chakra for any technique.
Note: Only targets with great reflexes and increased reaction speeds can dodge the technique
Note: Placing the Ten Seals and the Head Seal each count as a move, with the user needing to spend two moves to place both seals in the same turn.
Note: Can only be fully used 3 times.
( Sennin Modo ) – Sage Mode
Rank: S
Type: Supplementary
Range: N/A
Chakra cost: 70 (-15 per turn, adds 450 chakra points)
Damage points: N/A
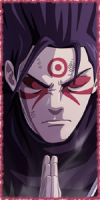
Description: The user, by clapping his hands together and concentrating will draw into him natural energy which he will then blend with their own chakra adding a new dimension of power to it. By doing this, the user gains access to what is called senjutsu chakra. This new chakra allows the user to enter an empowered state called Sage Mode, which then drastically increases the strength of his techniques and his physical prowess (speed, strength, stamina, etc). This variation is used by Senjun Hashirama bios and it was first seen in the flashback of Hashirama's fight with Madara. Apparently, Hashirama, through his wood techniques, can gather natural energy and enter sage mode with only a small delay and effort when compared with other users, indicating he can enter sage mode in an easier way than previously considered. Unlike other Sage Mode variants, Hashirama's Sage Mode seems un-related with any animal contract. When he activates sage mode, Hashirama's face gains markings around and under his eyes as well as one in the middle of his forehead reminiscent of a third eye. During the time the user is gathering Natural Energy (1 full turn), Hashirama can still control and use techniques, although he can't physically do any movement, including handseals. His physical strength, speed, stamina, reflexes, and durability dramatically increase, with much more emphasis on strength, endurance and stamina rather than speed and reflexes. While sage mode is active, minor wounds heal slowly as time passes and the user gains the ability to passively sense his surroundings through the natural energy, in a similar but more precise and enhanced way as normal chakra sensing. Unlike other techniques, the user will not feel any depletion in terms of stamina and energy and will feel revitalized and strong while its active. However, once it ends, the exhaustion of sustaining such a delicate chakra balance takes over the user until he can recover. While Sage Mode is active, the user will take little damage from techniques C-Rank and below, and A-Rank and below Taijutsu and their incredible chakra levels will increase their resistance to genjutsu, being immune to C-Ranks and below and taking -10 damage from all other genjutsu. When Sage mode ends the user then experiences physical exhaustion reducing their capabilities the following turn preventing him from using techniques above S-Rank and Taijutsu above B-Rank for 3 turns. The user can prevent this by using a shadow clone to collect natural energy and dispelling them before sage mode ends or by ending sage mode before it times out. Taijutsu gains +25 damage, Wood Release techniques gain +20 damage, Water and Earth gain +15 damage and Genjutsu gains +5 damage.
Note: Sage Mode lasts for a total of 6 turns, unless a clone is used.
Note: This variation can only be used by Senju Hashirama bios with Senjutsu.