How to make the shine effect on GIMP
Need:
The GIMP
GAP (GIMP animation Package. I'll put up a link soon)
The image you wanna shine
Basic Knowledge of Layers and other GIMP stuff (I'll try and be as detailed as possible)
Important steps are coloured in red for advance users who know what they are doing
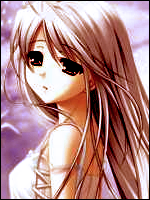
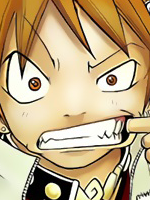
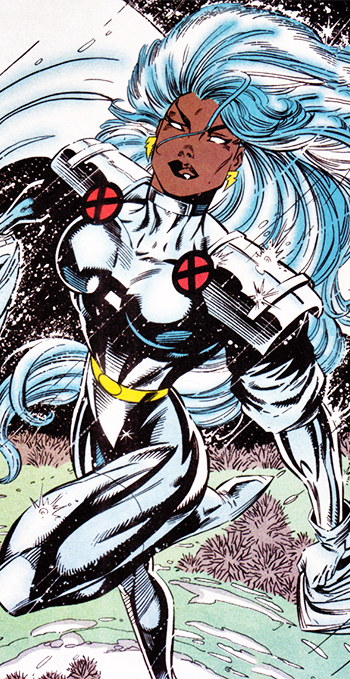
Start out by opening up a new GIMP image and paste in your image. I chose an old sig of mine
Make a New Folder and call it GAP (or whatever you wanna call it)
Save your image as background pic_000001.xcf in the new folder that you just created
Now open up a new GIMP image make it the same size as your previous image. Mine is 420 X 140 as my sig was that size.
Delete the default background layer and make a new layer. Okay, now we make our shine effect.
MAKING SHINE EFFECT:
Select the freeform select tool.
Our shine effect is pretty much just a giant bar running from one side to another. So the image we're aiming to make is this
Start from the bottom Left. When you click a dot forms which and you can continue from there.
go up and a bit to the right to make the wire slant. Make it slant as much as you think is right, but not too much
now click to the right
now downwards. try slanting it so it's parallel to the left
and then join the line to the first dot
*Note*
If you make a mistake when making the shine bar selecting undo or pressing CTRL + Z won't work, so you'll have to click on another tool to reset your selection and start again
This makes your selection. Now choose white as your colour, click on the fill tool and fill your selection. It should look like this
now save it as Shine.xcf in your GAP folder
MAKING OUR FRAMES
Open up background pic_000001.xcf. On the menu bar click on Video -> Duplicate frames
Set the "N Times" option to 100. Depending on how wide your image is you might want to add more frames or less, as more frames equals a smoother animation. An avatar would probably be at 50 frames. Click OK. It will take some time to create the frames.
*Note* Now they'll be a bunch of .xcf files in your GAP folder so don't be alarmed O.O
ANIMATING
With Shine.xcf open, go to background pic_000001.xcf and click on Video -> Move Path
A dialog box will pop up. Here is were we will animate.
1. First set your source image to Shine.xcf
2. change you step mode to none
3. change opacity to 45%
4. At the bottom click instant apply. Your shine bar appears
5. Now the X Slider. At the right of it there will buttons to increase or decrease the number, so decrease the number till your bar is just out of sight.
6. Now to the right click add point. Back at the X slider, slide it all the way to the right or till your bar disappears and click add point again
7. At the bottom right there is a button called Anim Preview. Click it.
A dialog box appears.
Check "exact object on frames" and set "Scale Preview" to 100%
The bottom slider is how fast your object (Shine bar) will move. 24fps is a decent speed so keep it at that if you want and click ok
Two new windows will open up. One will be a new GIMP image with all the frames and another will be the animation preview.
*Note* The bar is not supposed to be a solid white. this is just a rushed example
Click the play button to see your animation action. If you're happy with the speed of the animation continue to the next step, if not close both of the new windows and start again from step 7 and change the speed to what you prefer
ALMOST THERE
Close the Preview window and the move path dialog box. Now in your new Untitled image go to Filters -> Animation -> Optimize for GIF
A new window pops up.
In the new window go to Image -> Mode -> Indexed. Set Max colours to 256 and "Colour Dithering" to Floyd Steinberg (reduced colour bleeding)
Now Save it as "Whatever you want".GIF in a different folder. Make sure you click save as animation in the dialog box that appears and you're done
My first tut so I hope you like it. There will definitely be some problems so kindly point 'em out. I'd like to see your results so post 'em if below and if you have any questions post 'em below or PM me
Need:
The GIMP
GAP (GIMP animation Package. I'll put up a link soon)
The image you wanna shine
Basic Knowledge of Layers and other GIMP stuff (I'll try and be as detailed as possible)
Important steps are coloured in red for advance users who know what they are doing
Start out by opening up a new GIMP image and paste in your image. I chose an old sig of mine
You must be registered for see images
Make a New Folder and call it GAP (or whatever you wanna call it)
Save your image as background pic_000001.xcf in the new folder that you just created
Now open up a new GIMP image make it the same size as your previous image. Mine is 420 X 140 as my sig was that size.
Delete the default background layer and make a new layer. Okay, now we make our shine effect.
MAKING SHINE EFFECT:
Select the freeform select tool.
You must be registered for see images
Our shine effect is pretty much just a giant bar running from one side to another. So the image we're aiming to make is this
You must be registered for see images
Start from the bottom Left. When you click a dot forms which and you can continue from there.
You must be registered for see images
go up and a bit to the right to make the wire slant. Make it slant as much as you think is right, but not too much
You must be registered for see images
now click to the right
You must be registered for see images
now downwards. try slanting it so it's parallel to the left
You must be registered for see images
and then join the line to the first dot
You must be registered for see images
*Note*
If you make a mistake when making the shine bar selecting undo or pressing CTRL + Z won't work, so you'll have to click on another tool to reset your selection and start again
This makes your selection. Now choose white as your colour, click on the fill tool and fill your selection. It should look like this
You must be registered for see images
now save it as Shine.xcf in your GAP folder
MAKING OUR FRAMES
Open up background pic_000001.xcf. On the menu bar click on Video -> Duplicate frames
Set the "N Times" option to 100. Depending on how wide your image is you might want to add more frames or less, as more frames equals a smoother animation. An avatar would probably be at 50 frames. Click OK. It will take some time to create the frames.
*Note* Now they'll be a bunch of .xcf files in your GAP folder so don't be alarmed O.O
ANIMATING
With Shine.xcf open, go to background pic_000001.xcf and click on Video -> Move Path
A dialog box will pop up. Here is were we will animate.
You must be registered for see images
1. First set your source image to Shine.xcf
2. change you step mode to none
3. change opacity to 45%
4. At the bottom click instant apply. Your shine bar appears
5. Now the X Slider. At the right of it there will buttons to increase or decrease the number, so decrease the number till your bar is just out of sight.
6. Now to the right click add point. Back at the X slider, slide it all the way to the right or till your bar disappears and click add point again
7. At the bottom right there is a button called Anim Preview. Click it.
A dialog box appears.
You must be registered for see images
Check "exact object on frames" and set "Scale Preview" to 100%
The bottom slider is how fast your object (Shine bar) will move. 24fps is a decent speed so keep it at that if you want and click ok
Two new windows will open up. One will be a new GIMP image with all the frames and another will be the animation preview.
You must be registered for see images
*Note* The bar is not supposed to be a solid white. this is just a rushed example
Click the play button to see your animation action. If you're happy with the speed of the animation continue to the next step, if not close both of the new windows and start again from step 7 and change the speed to what you prefer
ALMOST THERE
Close the Preview window and the move path dialog box. Now in your new Untitled image go to Filters -> Animation -> Optimize for GIF
A new window pops up.
In the new window go to Image -> Mode -> Indexed. Set Max colours to 256 and "Colour Dithering" to Floyd Steinberg (reduced colour bleeding)
Now Save it as "Whatever you want".GIF in a different folder. Make sure you click save as animation in the dialog box that appears and you're done
My first tut so I hope you like it. There will definitely be some problems so kindly point 'em out. I'd like to see your results so post 'em if below and if you have any questions post 'em below or PM me