About this TUT:
Using Layer Mask to change the color of original image
Level of Difficulty:Medium
Time required:15 Minutes[mostly depends on the image]
Now Open the required image
Now remove the lock by double clicking on it and rename it.
Now Press CTRL+J to duplicate the layer.Press the Icon highlighted [its the layer mask button].That should look like the image below
Now select a color that you want your image to be changed to.It can be selected by clicking the large black and white rectangles to the left bottom
Now select the image which as got Layer Mask, fill the required portion.Ofcourse I filled the entire image,depends on the image
In the layers tab now open up the drop down menu and keep changing it till the desired result.
Change as per requirements
Result:
Original Image:
With HUE:
With SOFTLIGHT:
Its my first PS tutorial so it might not be detailed.Thanks for going through.
Using Layer Mask to change the color of original image
Level of Difficulty:Medium
Time required:15 Minutes[mostly depends on the image]
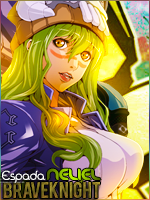
Now Open the required image
You must be registered for see images
Now remove the lock by double clicking on it and rename it.
You must be registered for see images
Now Press CTRL+J to duplicate the layer.Press the Icon highlighted [its the layer mask button].That should look like the image below
You must be registered for see images
Now select a color that you want your image to be changed to.It can be selected by clicking the large black and white rectangles to the left bottom
You must be registered for see images
Now select the image which as got Layer Mask, fill the required portion.Ofcourse I filled the entire image,depends on the image
You must be registered for see images
In the layers tab now open up the drop down menu and keep changing it till the desired result.
You must be registered for see images
Change as per requirements
You must be registered for see images
You must be registered for see images
Result:
Original Image:
You must be registered for see images
With HUE:
You must be registered for see images
With SOFTLIGHT:
You must be registered for see images
Its my first PS tutorial so it might not be detailed.Thanks for going through.
Last edited: