Awards


~Simple guide to basic smudge,and avatar corners~
~Smudge~
We start our project by first making a 350x140 document,then,we go to Filter-Render-Clouds,remember to set your colors to light blue and white before doing this.After that,you take this image :
Resize it,and change it`s mode to Overlay,after that you will have something like this :
Then,you take a render that matches the colors you used,for example,i used this,you can use it to just to get used to smudging first :
You resize it based on the focal you want,and put it anywhere on the image you made.Till now,i have something like this :
Now,you leave this untouched,and go to File-New and make a document 50x50 with a transparent background,then,you take the text tool,and make a T,make it so it is covers the whole area,like this :
Then,you go to Edit-Define Brush Preset... and click OK.
After that,close that project and go back to the original one,make 3 copies of your render by clicking on it and taping Control+J 3 times,make the first 3 invisible and only leave the first one visible.
After that,select smudge tool,in the brush area select the T brush we just made (It is in the end of the list),then,go to Brush Settings,and set up the brush like this :
After that,start smudging each layer of the render in its own direction,play a little with the different layer modes,and each time you finish one layer,make the upper layer visible and smudge that one,i suggest you smudge only the edges of the upper layer,then,on the upper layer,Right Click-Blending Options-Color Overlay,and choose a color fitting with your background,after that,set it to Overlay and lower the opacity a little if you want.
We are almost done,after all this,Flatten the image by clicking on either one of the layer with a right click and choose Flatten Image,then,on the image we just created,Right Click-Blending Options-Stroke,and set it up like this :
My final result is this :
~Avatar Corners~
First off,you make an avatar,then,Right Click on a random layer on it,and press Flatten Image,i now have something like this :
Then,you choose the rectangle shape Mask Tool :
And set up the Radius to one that fits your avatar.
You draw a shape on top of your image,and when you release click,you will notice that a layer in shape of the one you want,is covering your image.
Well,on that layer,you will notice 2 icons,the one on the right,is the Mask Shape icon,simpy drag that on top of your avatar,and erase the color layer above.
Then,on the layer you have left,Right Click-Blending Options-Stroke,and set it up like this :
You are going to need some Photoshop patterns,for this one,i used these :
You can find many patterns there.
My final result is this :
We start our project by first making a 350x140 document,then,we go to Filter-Render-Clouds,remember to set your colors to light blue and white before doing this.After that,you take this image :
You must be registered for see links
Resize it,and change it`s mode to Overlay,after that you will have something like this :
You must be registered for see images
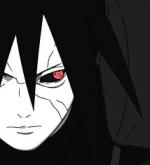
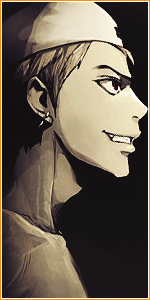
Then,you take a render that matches the colors you used,for example,i used this,you can use it to just to get used to smudging first :
You must be registered for see images
You resize it based on the focal you want,and put it anywhere on the image you made.Till now,i have something like this :
You must be registered for see images
Now,you leave this untouched,and go to File-New and make a document 50x50 with a transparent background,then,you take the text tool,and make a T,make it so it is covers the whole area,like this :
You must be registered for see images
After that,close that project and go back to the original one,make 3 copies of your render by clicking on it and taping Control+J 3 times,make the first 3 invisible and only leave the first one visible.
You must be registered for see images
After that,select smudge tool,in the brush area select the T brush we just made (It is in the end of the list),then,go to Brush Settings,and set up the brush like this :
You must be registered for see images
You must be registered for see images
You must be registered for see images
After that,start smudging each layer of the render in its own direction,play a little with the different layer modes,and each time you finish one layer,make the upper layer visible and smudge that one,i suggest you smudge only the edges of the upper layer,then,on the upper layer,Right Click-Blending Options-Color Overlay,and choose a color fitting with your background,after that,set it to Overlay and lower the opacity a little if you want.
You must be registered for see images
We are almost done,after all this,Flatten the image by clicking on either one of the layer with a right click and choose Flatten Image,then,on the image we just created,Right Click-Blending Options-Stroke,and set it up like this :
You must be registered for see images
My final result is this :
You must be registered for see images
~Avatar Corners~
First off,you make an avatar,then,Right Click on a random layer on it,and press Flatten Image,i now have something like this :
You must be registered for see images
Then,you choose the rectangle shape Mask Tool :
You must be registered for see images
And set up the Radius to one that fits your avatar.
You must be registered for see images
You draw a shape on top of your image,and when you release click,you will notice that a layer in shape of the one you want,is covering your image.
You must be registered for see images
Well,on that layer,you will notice 2 icons,the one on the right,is the Mask Shape icon,simpy drag that on top of your avatar,and erase the color layer above.
You must be registered for see images
Then,on the layer you have left,Right Click-Blending Options-Stroke,and set it up like this :
You must be registered for see images
You are going to need some Photoshop patterns,for this one,i used these :
You must be registered for see links
You can find many patterns there.
My final result is this :
You must be registered for see images
I hope this tutorial was easy for you,and if you have any questions,ask them either here,either on VMs.
And something else,if you actually are going to follow this tutorial,please submit your final results here,thank you.
And something else,if you actually are going to follow this tutorial,please submit your final results here,thank you.
")
Last edited: